How To Pair Shock Collar With Remote – 9 Simple Techniques
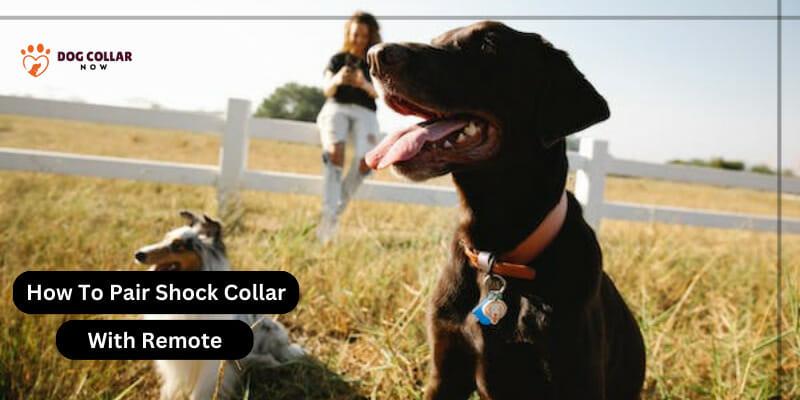
Pet parents and training enthusiasts! It’s time to unleash the magic of a seamless connection between you and your fur baby’s new best friend – the shock training collar and its trusty sidekick, the remote!
To pair a shock collar with its remote, follow the manufacturer’s instructions by typically pressing a button on the remote while turning on the collar. Ensure both devices are on the same channel to establish a successful connection.
If you’re ready to embark on a journey of training triumph, then grab that collar and remote – we’re about to dive into the ultimate pairing process! Say goodbye to confusion and hello to a synchronized training dream team!
By understanding how to pair shock collar with remote correctly, you can make the most of this training tool and help your dog become a well-behaved companion.
What You Need Before Pairing A Shock Collar With A Remote
Before you begin the process of pairing a shock dog training collar with a remote, it’s important to gather everything you need to ensure a successful training session for your furry friend. Here are the essential items you should have on hand before getting started.
- Ensure you have both the shock collar and its remote transmitter or receiver collar. Wondering how shock collars work? Get ready to discover the magic of training wizardry.
- Check and replace batteries for proper functionality.
- Read the instruction manual to understand button functions and styles.
- Choose a quiet, distraction-free environment for effective training.
By having all these items prepared beforehand, you’ll be setting yourself up for success as you embark on this journey of training and bonding with your beloved canine companion!
How To Pair Shock Collar With Remote – Step by Step Guide
Alright, let’s get this party started! Time to bring the shock dog collar and its trusty remote together for some top-notch training!
Check Compatibility
Before we dive into the steps to pair your collar, make sure your shock collar and remote are a perfect match made in training heaven! Double-check they’re from the same brand and functions for seamless communication.
Power On Both Devices
Let the training magic begin! Turn on both the shock collar and the remote transmitter. Some collars might have a separate power button, while others come alive with a gentle touch on your pup’s neck. Follow the instructions and power them up correctly.
Find The Right Channel
Avoid interference and keep things crystal clear! Most collars and remotes come with multiple channels. Make sure they’re both tuned to the same channel to speak the same training language.
Activate Pairing Mode
Time to get the party started! Look for a special button or follow the secret code in the instruction manual to activate the pairing function on both the collar and the remote. Let them know they’re about to become a power duo!
Watch For Visual And Audible Cues
Listen up and keep an eye out! Some collars and remotes have fancy LED lights or beeping sounds to signal successful pairing. Wait for those little sparks of confirmation to light up your training adventure!
Test The Connection
Ready, set, test! Try using the remote’s controls to see how your shock collar reacts. Check if the stimulation levels work as expected and adjust them if needed. Make sure they’re in sync for a smooth training journey.
Keep It Secure
Lock in that connection, buddy! After successful pairing, keep the collar and remote within the manufacturer’s recommended range. It’s like staying close to your BFF for reliable communication during training sessions!
Read The Manual Thoroughly
Last but not least, be a savvy trainer! Grab a cup of coffee and read that user manual like a boss. Get to know all the cool training options and features to unleash the full potential of your shock collar and remote duo!
Train With Love And Patience
Time to shine like a training superstar! Use the shock collar responsibly and combine it with positive reinforcement techniques. Remember, patience and love are your secret training weapons, ensuring your furry friend enjoys every step of the learning journey!
Remember that every product may have slight variations in its pairing process so always consult manufacturer guidelines provided with your specific model for accurate instructions.
Tips For Successful Pairing
- Ensure that both the shock collar and remote have fresh batteries to avoid any interruptions during the pairing process.
- Make sure that the remote and shock collar are close to each other while pairing. This will ensure a strong connection between the two tools.
- Follow the manufacturer’s instructions carefully when it comes to putting both tools into pairing mode. Typically, this involves pressing and holding a specific button on either the remote or shock collar until they enter pairing mode.
- Once in pairing mode, listen for a beep or look for a flashing light on both tools to indicate a successful connection.
- If you encounter any difficulties during the pairing process, try resetting both gadgets by turning them off and then back on again before attempting to pair them again.
- Remember to be patient as sometimes it may take a few attempts before successfully pairing the remote with the shock collar.
By following these tips, you can ensure the successful pairing of your shock collar with its remote, allowing you to effectively train your dog using this training tool!
Choosing The Right Remote And Shock Collar
When it comes to choosing the right remote and shock collar for your dog’s training needs, there are a few key factors to consider.
You want to ensure that the remote has all the necessary features and functions to meet your training goals. Look for remotes that have multiple buttons or modes, allowing you to customize the level of correction based on your pet’s response.
The range of the remote is also very important. Depending on how far away you need to be from your pet when giving commands or corrections, you’ll want a remote with a suitable range. This will allow you to effectively communicate with your dog even from a distance.
It’s crucial to choose a shock collar that is comfortable and safe for your furry friend. Go for collars with adjustable straps to ensure a snug, comfy fit without causing any collar sores on your precious pooch. Look out for durable materials that won’t irritate or bother them during their daily adventures
Don’t forget about battery life! A long-lasting battery will ensure uninterrupted training sessions without worrying about running out of power at critical times.
By taking these factors into consideration, you can select the perfect combination of remote trainer and shock collar that suits both your needs as well as those of your beloved pet.
Tips For Using The Shock Collar And Remote Properly
Using a shock collar and remote properly is crucial for effective dog training. Here are some tips to ensure you’re getting the most out of your training tool.
1. Familiarize Yourself With The Functions: Before using the shock collar, take time to understand its various settings and features. Read through the user manual provided by the manufacturer and explore each function carefully.
2. Start With Low Levels: Start off the training with gentle static stimulation or vibration levels. This way, your furry pal can ease into the sensation, avoiding any unnecessary stress or discomfort. Let’s make training a positive and enjoyable experience!
3. Use Positive Reinforcement: Pairing positive reinforcement like treats, praise, or playtime with the desired behavior helps reinforce good habits in your furry friend while using the shock collar as a corrective tool when needed.
4. Be Consistent: Consistency is key when it comes to utilizing a shock collar effectively. Use clear commands along with appropriate button presses on the remote consistently so that your pet can associate actions with specific cues.
5. Avoid Overuse: It’s important not to rely solely on the shock collar for training purposes and avoid continuous use without breaks. Give your pet regular rest periods between sessions and remember that positive reinforcement should always be prioritized over aversive techniques.
6. Monitor Your Pet’s Reaction: Pay close attention to how your dog responds during training sessions – both physically and emotionally. Look for signs of stress or discomfort such as excessive panting, lowered tail, or avoidance behaviors, and adjust accordingly if necessary.
Remember that every dog is unique, so it’s essential to adapt these tips based on their temperament, breed, age, and individual needs for successful results in their training journey!
Troubleshooting Tips
1. Check The Batteries
One common issue when pairing a shock collar with a remote is battery-related. Make sure both the remote and the collar have fresh batteries. If either one is low on power, it may prevent a successful pairing.
2. Ensure Proper Placement
The positioning of the receiver on your pet’s neck plays a crucial role in effective communication between the remote and collar.
In your quest for safe training, remember the golden rule: a well-fitted shock collar can work wonders, but a loose one can be a real threat! Ensure it sits high on their neck and snugly secured – this way, clear signals flow while keeping your furry friend out of harm’s way!
3. Verify Signal Range
If you’re experiencing difficulty with pairing, check if you are within range of the tool. Some models have limited distances for optimal functionality. Move closer to your pet and try again.
4. Reset Both Devices
Sometimes, a simple reset can solve many issues encountered during pairing processes. Press and hold down the reset button on both the remote transmitter and receiver simultaneously until they sync up again.
5. Consult The User Manual Or Manufacturer’s Support
If all else fails, consult your user manual for troubleshooting instructions specific to your model of shock collar and remote trainer system.
Conclusion
In the exciting world of dog training, a shock collar paired with a remote becomes your secret weapon for unleashing your furry friend’s potential! These dynamic duos are here to transform training into an adventure of bonding and learning.
With the right pairing and proper usage, you’ll witness your pup’s obedience and safety soar to new heights! So, take a leap into effective training by following our guide to pairing a remote with a shock collar.
But hey, we know challenges might pop up along the way – no worries! Our troubleshooting tips are at your service to conquer any hiccups and ensure victorious training sessions for you and your canine companion. Get ready to embrace success and the incredible connection that blooms between you and your loyal fur buddy!
Can I pair more than one shock collar with the remote?
Yes, you can pair up to 2 shock collars with the collar receiver.
How do I know if the shock function is activated?
When the shock function is activated, you will see an indicator light or hear a beep sound.
What is the weight limit for using the shock collar?
The weight limit for using a shock collar varies depending on the specific product, but it typically ranges from 5 to 120 pounds.
How long does it take to charge the shock collar?
Charging time for shock collars varies by model, but it typically takes around 2 to 4 hours to fully charge the collar’s battery.
How do I stop my dog from barking using the shock collar?
To stop your dog from barking, use the shock function by pressing and holding the power button.
What does a solid green LED indicator on the shock collar mean?
A solid green LED indicator on the shock collar means that the battery is fully charged.