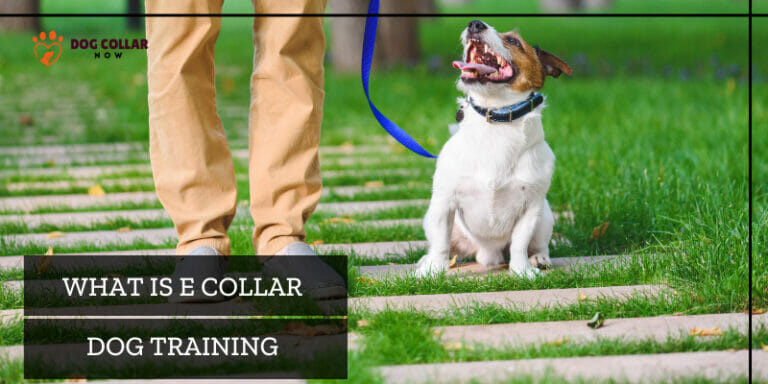
How To Make Reflective Dog Collars – 9 Easy Measures

Are you tired of playing hide-and-seek with your furry friend during your evening walks? Imagine being able to spot your dog effortlessly, even in the low light. Sounds like a dream? Well, it’s time to turn that dream into reality.
To make a reflective dog collar, you’ll need a durable collar material like nylon or leather, reflective tape or fabric paint, a collar buckle, a D-ring, and a sewing kit. Simply cut and measure the material, apply the tape, and assemble the collar by attaching the buckle and D-ring.
Welcome to our step-by-step guide on “How to Make Reflective Dog Collars.” Not only will this do-it-yourself project boost your dog’s safety during those early morning or late-night walks, but it’s also a perfect opportunity to showcase your creativity.
What Materials Are Needed
To make a reflective dog collar, you’ll need a few basic materials. These include
- A strip of durable fabric or leather
- Reflective tape
- Reflective fabric paint
- A collar buckle
- A D-ring for leash attachment
- A sewing kit
How To Make Reflective Dog Collars – Steps
If you want to personalize the collar, consider materials like embroidery thread, charms, or badges.
Step 1: Choosing the Right Material
First things, you need to choose the right material for your dog collar. Durable materials such as nylon or leather are ideal due to their longevity and resistance to wear and tear.
Step 2: Measuring Your Dog’s Neck
It’s crucial to ensure the collar will fit your dog comfortably. Measure your dog’s neck and add a couple of inches for adjustments. Then, cut your material to this length.
Step 3: Measure And Cut
Now, you need to measure your dog’s neck. Add a couple of inches for adjustments and cut your collar material to this length. The width of the strip will be the width of the collar, so keep it comfortable for your dog.
Step 4: Apply The Radiant Tape
Next, apply the sticky band to the collar material. Make sure it’s centered and covers the entire length of the material. You can sew it on or use a strong adhesive, depending on the type of sticky band you have.
Step 5: Attach The Buckle
Once your radiant sticky band is securely attached, it’s time to add the buckle. Sew it onto one end of the collar material, ensuring its secure and stable. You’re halfway there!
Step 6: Add The D-Ring
On the opposite end of the buckle, you’ll need to add the D-ring. This will serve as the attachment point for your leash.
Step 7: Test It Out
Finally, wrap the collar around your dog’s neck to test the fit. It should be snug, but comfortable. If it’s too loose or tight, adjust accordingly.
Step 8: Personalize
Now for the fun part — customization! Add any extras like charms, badges, or even your dog’s name with some embroidery thread. Make it as unique as your furry friend!
Step 9: Using Reflective Thread
For an added level of visibility, consider using reflective thread for your sewing. Not only does it add to the overall reflective nature of the collar, but it also provides a unique, stylish look.
And there you have it! In simple steps, you’ve created a radiant pet collar that not only looks good but also enhances your dog’s safety during your outdoor adventures. Happy crafting!
Tips And Tricks For Making The Perfect Collar
When it comes to making the perfect radiant pet collar, there are a few tips and tricks that can help you create a high-quality product.
- Consider the size of your dog and adjust the length of the collar accordingly. You want to make sure that it fits comfortably around their neck without being too tight or too loose.
- Next, choose a material such as nylon webbing or leather for your collar base. These materials are strong enough to withstand wear and tear over time while also providing comfort for your furry friend.
- In terms of color, opt for bright shades such as orange or yellow as they will increase noticeability in low-light conditions. Additionally, consider adding a radiant sticky band throughout the collar design to further enhance its visibility.
- When stitching together your collar pieces, use an industrial sewing machine if possible to ensure durability and strength. Add any finishing touches like plastic clips or metal hardware before testing out the final product on your pup.
By following these simple tips and tricks, you can create a custom radiant pet collar that is not only fashionable but also functional in keeping your furry friend noticeable during nighttime stroll.
Alternatives To Making Your Own Reflective Dog Collar
There are plenty of alternatives to making your own radiant pet collar. Here are a few options to consider:
- Buying Pre-Made Reflective Collars: Plenty of pet stores and online marketplaces offer a wide range of pre-made radiant pet collars. You can choose from various colors, materials, and designs. The best part is they come in different sizes, ensuring a perfect fit for your pooch.
- Using Reflective Collar Covers: If you already have a collar that your dog loves, you don’t have to replace it. Simply get a radiant collar cover. These covers slide over your existing collar, providing the same noticeability benefits without the need for a whole new collar.
- Reflective Leashes And Harnesses: If your dog isn’t a fan of collars, consider shiny leashes or harnesses. They provide the same level of visibility and are often more comfortable for some dogs.
- Clip-On LED Lights: For an extra touch of noticeability, consider adding clip-on LED lights to your dog’s collar. These tiny lights are powerful, long-lasting, and can be seen from a distance.
Choose the alternative that best suits your dog’s comfort and your convenience. After all, every dog deserves to shine!
Diy Ideas To Make Dog Collar Reflective?Dogs
Looking for a way to make more visibility of dog in the dark? A radiant collar can help keep your furry friend safe during a nighttime stroll.
- Sparkling Safety Strips: Grab some radiant adhesive line, available at most hardware or craft stores. Cut it into thin strips and carefully apply them to your dog’s collar. The radiant material will catch the light, making your dog visible during nighttime tours.
- Glowing Glowsticks: Get a few Glowsticks from a party supply store, making sure they’re non-toxic and suitable for pets. Cut a small section of the glow stick and place it inside a transparent tube or casing. Attach this to your dog’s collar, and it will emit a soft glow, enhancing noticeability.
- Shimmering Shrink Plastic: Look for shrink plastic sheets, which you can find at art or stationery shops. Draw or trace shapes onto the plastic and cut them out. Follow the instructions on the packaging to shrink them down. Once shrunk, these glowing charms can be attached to your dog’s collar for added flair and noticeability.
- Brilliant Beads: Gather a string of colorful beads, preferably ones that have a radiant or iridescent finish. Slide the beads onto a sturdy thread or cord, creating a beaded necklace. Make sure it’s long enough to wrap around your dog’s collar and tie it securely. The beads will catch the light and make your pup’s collar shine.
- Luminous Leather Accents: If your dog’s collar is made of leather, consider adding some shiny leather accents. You can purchase glowing leather patches or strips from specialty pet stores or online. Simply glue or stitch them onto the collar to create a stylish and safe accessory.
Tips And Tricks For Customizing The Design
Here are some tips and tricks for creating a custom-made, high-quality reflective collar.
- Consider Your Dog’s Size:
Choose a collar that is suitable for your dog’s size to ensure comfort and proper fit.
- Pick Complementary Colors:
Opt for bright hues like neon green or orange that not only make your dog more visible but also enhance their appearance.
- Use High-Quality Materials:
Select materials such as nylon webbing or leather to ensure the collar can withstand playtime and is comfortable for your dog to wear.
- Add Decorative Elements:
Personalize the collar with charms or engraved name tags that reflect your dog’s personality and interests.
- Prioritize Safety And Style:
By following these customization tips, you can create a collar that not only keeps your dog safe but also adds a touch of style to their ensemble.
Remember, customizing your dog’s collar allows you to showcase its unique personality while ensuring its safety during nighttime adventures!
Conclusion
A reflective dog collar can make all the difference when it comes to keeping your furry friend safe. Whether you choose to purchase one or make your own, remember that high-quality reflective gear is essential for making your dog more visible in low-light conditions.
With the tips and tricks we’ve provided, you’ll be able to learn how to make reflective dog collars that fit both your dog’s size and style preferences. And if DIY isn’t quite your thing, there are plenty of great options available for purchase as well.
Remember to always prioritize safety when it comes to walking or running with your pup at night. A little extra noticeability goes a long way in ensuring that both you and your furry companion stay out of harm’s way.
FAQs
What type of material is best for a dog collar?
Materials like nylon or leather are usually the best choices for dog collars due to their longevity and resistance to wear and tear.
How often should I clean the reflective dog collar?
Regular cleaning is recommended, especially if your dog spends a lot of time outdoors. A simple hand wash with mild soap and water should suffice.
How do I know if the collar is the right size for my dog?
The collar should fit comfortably around your dog’s neck without being too tight or too loose. You should be able to fit two fingers between the collar and your dog’s neck.
Can I use any reflective material for the collar?
Yes, you can use any reflective material, such as reflective band or fabric paint, as long as it securely adheres to the collar material.
What should I do if the reflective material starts to peel off?
If the reflective material begins to peel off, it’s best to replace it immediately to ensure the collar retains its reflective properties.